You notice it only when the light hits just right. That pale, jagged scratch on your wooden coffee table, the one that wasn’t there yesterday, now catching your eye like a tiny scar. Maybe it was your keys, maybe a toy car, maybe that plate you dragged instead of lifted during movie night. You run your fingers over it, hoping it will just… vanish. It doesn’t.
So you start thinking of expensive repair kits, sanding, varnish, or just living with it and pretending not to see.
Then someone casually says, “Why don’t you rub a walnut on it?”
The funny thing is: it actually works.
Why a simple walnut can rescue scratched wood
There’s something almost magical about walking into a room and seeing wood that glows. A dining table with history, a sideboard you inherited, a coffee table that’s survived countless dinners and remote-control drops. You accept the tiny flaws, until one day a long, fresh scratch appears and suddenly that’s all you can see.
That’s the moment when a small, ordinary walnut becomes a tiny superhero for your furniture.
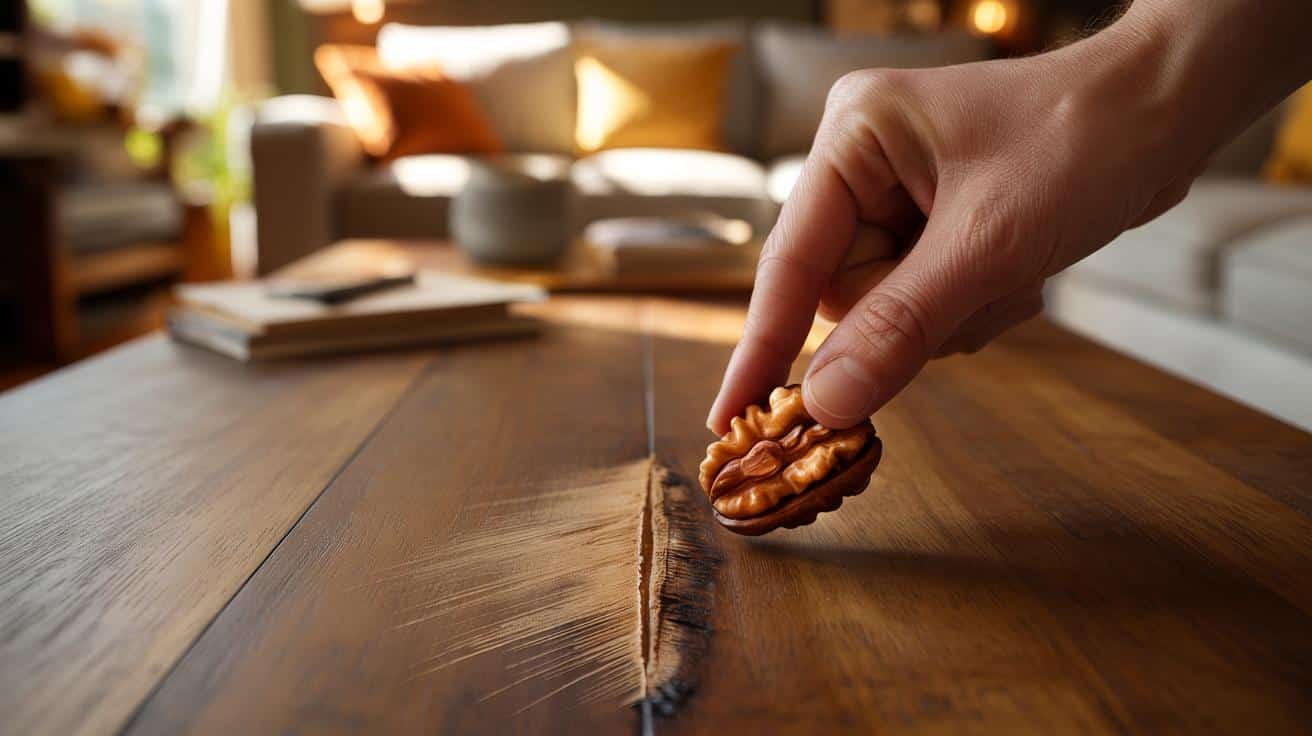
Picture this. A friend sends you a short video: a hand, a scratched oak table, a single walnut. They rub the nut along the scratch, back and forth, like they’re sketching a secret line. Within seconds, the pale mark darkens. The scratch doesn’t completely disappear, but it fades into the wood, as if it’s been there for years and somehow belongs now.
You replay the clip twice, suspicious and slightly impressed, then grab the bag of walnuts at the back of your cupboard.
The trick works fast because the walnut is doing two jobs at once. Its natural oils seep into the scratch, darkening the bare, exposed fibers. At the same time, microscopic walnut particles cling to the rough edges and act a bit like a pigment. On many types of brown wood, those oils and pigments visually “mimic” the existing stain.
Your eye stops seeing bright damage and starts seeing continuous color again, which is all your brain really needed.
➡️ What happens to your blood sugar when you snack late at night
➡️ The body signal that often appears weeks before burnout hits
➡️ Neither in the box nor in the fridge door: how to store eggs to protect your health
➡️ This camper’s secret keeps food cool all day without a cooler
➡️ Mechanics’ secret to remove rust without scraping or sanding
➡️ A mother sets off to find her son missing for five years and what she discovers tears families apart
➡️ Forget baking soda: this housekeeper’s trick makes bad odors disappear for good
➡️ This supermarket butter under €4 is the healthiest choice, according to 60 Millions de consommateurs
How to actually do the walnut trick (without ruining anything)
Start with a clean, dry surface. Wipe the scratched area with a soft cloth to remove dust and crumbs, then let it dry fully. Take a raw walnut kernel, no salt, no sugar, just the nut itself.
Gently rub the walnut along the scratch, following the direction of the grain. Don’t press too hard. Short, repeated passes are better than one aggressive swipe.
Once the scratch is coated, leave it alone for around 30 seconds. That pause lets the oil sink into the exposed wood. Then lightly buff the area with a soft cloth or an old cotton T‑shirt, working in small circles. The excess oil disappears, the shine evens out, and the scratch blends into the surrounding color.
If the mark is still too visible, repeat the process once or twice. Think of it like layering transparent makeup rather than painting a wall.
Lots of people go wrong because they treat the walnut like a magic eraser. They rub wildly, on the whole tabletop, then complain it “doesn’t work”. Let’s be honest: nobody really does this every single day. You’re trying this trick when something already feels a bit ruined, and there’s a mix of impatience and hope in your movements.
The best results come when you stay calm and precise. Treat the scratch, not the whole surface. Test on a hidden corner first if your furniture has a very light or unusual finish.
- Use only raw walnuts – roasted or flavored nuts contain additives that can stain or leave a sticky film.
- Target fine, shallow scratches – deep gouges or chipped corners need filler or professional repair.
- Avoid very pale woods – on whitewashed or very light furniture, the oil can darken the area too much.
- Buff gently after rubbing – this spreads the oil so the fix looks natural, not greasy.
- *If you’re allergic to nuts, skip this trick altogether and look for a wood touch‑up pen instead.*
What this small trick really changes at home
Behind this walnut hack, there’s something a bit deeper than a shiny table. You’re reclaiming a piece of your home from the category of “damaged” and putting it back into “lived‑in but loved”. One tiny scratch no longer dictates whether your furniture looks neglected or cared for.
You also discover that not every flaw needs an industrial solution or a professional bill to feel better.
| Key point | Detail | Value for the reader |
|---|---|---|
| Walnut oils mimic stain | Natural oils and pigments darken exposed wood fibers | Instant visual improvement without special products |
| Best for light surface scratches | Works where the finish is scraped, not deeply gouged | Avoids disappointment on damage that needs real repair |
| Quick, low‑cost fix | Uses a common pantry ingredient in under two minutes | Reduces stress and saves money on minor furniture mishaps |
FAQ:
- Question 1Does the walnut trick work on all types of wood?
- Question 2How long does the effect of the walnut last on a scratch?
- Question 3Can I use any nut, or does it have to be a walnut?
- Question 4Is it safe to use this method on antique or valuable furniture?
- Question 5What can I try if the walnut doesn’t improve the scratch enough?